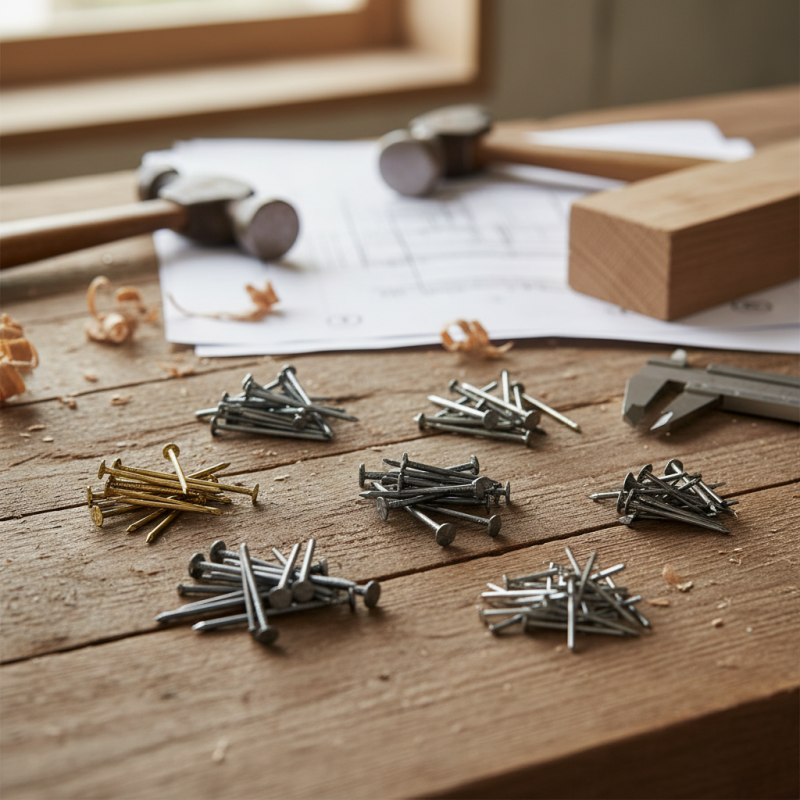
When working on your DIY projects, understanding the types of finish nails is crucial. These nails not only hold your materials together but also affect the overall appearance of your work. Selecting the right finish nail can be a challenge for both beginners and experienced craftsmen.
There are various types of finish nails available, each serving specific purposes. Some are designed for hardwoods, while others are better suited for softer materials. The size and finish of the nails play a significant role as well. Choosing the wrong type might lead to issues like splitting wood or visible nail heads.
It's essential to consider the details of your project. The right choice can elevate your craftsmanship. However, it's common to overlook the importance of nail types, leading to less satisfying results. Reflecting on your experiences can help improve your future projects. The journey of mastering finish nails is a continuous learning experience.
When it comes to finish nails, understanding the types can greatly improve your project outcomes. Finish nails are smaller than common nails. They typically range in length from 1 inch to 3 inches and in gauge from 15 to 18. Their design allows them to provide a neat appearance. A recent report by the Home Improvement Research Institute shows that 48% of DIYers prefer using finish nails for crown molding and trim work.
Common varieties of finish nails include the 16-gauge and 18-gauge nails. The 16-gauge nails are thicker and provide more holding power. They are often used in heavier applications. Conversely, 18-gauge nails are thinner and cause less splitting in delicate wood. The choice between the two often depends on the wood type and the project scope. An industry survey indicates that nearly 60% of professionals recommend 16-gauge for furniture projects, while 18-gauge is favored for baseboards and casings.
Choosing the right finish nail isn’t straightforward. Project specifics and materials must be considered. Misjudging the size can lead to poor adhesion or visible holes. Inexperiences can result in over-penetration, damaging surfaces. Despite the abundance of information, it’s vital to experiment and adjust based on individual needs. Emphasizing quality and compatibility can lead to stunning results in woodworking projects.
When it comes to finish nails, the materials play a critical role in their performance and suitability for various projects. Steel finish nails are the most common choice. They are strong and affordable, making them ideal for a wide range of applications. However, they are prone to rust over time. According to a 2022 industry report, around 75% of professionals recommend using steel nails outdoors only when they are coated for added protection.
Stainless steel finish nails are a popular alternative. They resist corrosion, making them suitable for high-moisture environments like bathrooms and kitchens. Experts suggest using these for projects that require durability and longevity. An analysis in 2023 indicated that stainless steel nails have seen a 40% increase in use among contractors, especially in coastal areas. Their higher cost can be justified by their lifespan and performance.
Copper finish nails provide a distinct look and excellent corrosion resistance. While generally more expensive, they are favored for aesthetic applications or historical restorations. However, some contractors express concerns about their softer nature, which can lead to bending during installation if not handled properly. A recent study highlighted that 20% of users encountered installation issues with copper nails due to improper techniques. Understanding the properties of each material will help in making informed decisions for your projects.
When tackling finish carpentry tasks, selecting the right finish nail size is crucial. The gauge of a finish nail affects its strength and how it holds materials together. Common gauges range from 15 to 18. A thicker nail is stronger but leaves a larger hole. This can be a concern when aesthetics are essential.
Nail length is equally important. It must penetrate both pieces of wood securely. For trim work, lengths typically vary from 1 inch to 2.5 inches. A 1.25-inch nail is great for thin moldings, while longer nails can secure heavier pieces. Measure twice to avoid mistakes. Sometimes, a nail simply won't hold properly, especially if the wood is split or dry.
Many beginners overlook the significance of both gauge and length. A miscalculation can lead to loose joints or unsightly finishes. It's worth taking the time to understand these aspects. Proper nail selection not only enhances durability but also improves the overall appearance of your project.
When embarking on a DIY project, the type of finish nails you choose plays a crucial role. Trim work is a prime application for finish nails; they are perfect for securing baseboards and crown moldings. A 1.25-inch to 2.5-inch length is commonly used. These nails provide a clean finish, minimizing the chance of splitting. However, improper insertion can lead to visible marks. It's essential to practice precision.
In furniture building, finish nails help attach veneers and joints with subtlety. A pneumatic nailer can expedite this process, but it also requires care. Overdriving the nails can create unsightly dings in the wood. Always test on a scrap piece first to avoid mistakes. For cabinetry, a consistent nail type ensures alignment and a professional look. Remember, even skilled DIYers can make errors; it's part of the learning curve.
Using finish nails for wall paneling gives a polished effect. However, ensure you select the right length to avoid reaching the studs unnecessarily. A common oversight is underestimating the nail size, which can impact durability. Lastly, consider your project’s scope; sometimes, a simple brad nail could suffice. It’s all about evaluating your needs and learning from any missteps.
Choosing the right finish nails for your projects can greatly impact the final results. Start by considering the material you are working with. Softwoods like pine require different nails than hardwoods such as oak. Additionally, the thickness of the material may influence your choice. Thicker boards need longer nails for a secure hold.
Evaluate the finish you desire. If you plan to stain or paint, opt for nails that leave minimal visible holes. Look for options that feature a smaller head or a higher quality finish. These choices help achieve a smoother appearance. If you're new to using finish nails, practice is essential. Mistakes can happen, like using a nail too long or too thin for your project.
It's wise to have an assortment of finish nails on hand. This variety allows for flexibility with different projects. Understand that different nails may behave differently with various materials. This inconsistency can lead to challenging situations. Always test a few nails on scrap wood before committing to your final project.
| Type of Finish Nail | Length | Common Uses | Advantages | Considerations |
|---|---|---|---|---|
| Bright Finish Nails | 1" - 3" | Trim Work, Molding | Smooth finish, Ideal for visible work | May rust over time if not painted |
| Galvanized Finish Nails | 1" - 3.5" | Outdoor Projects, Decking | Rust-resistant, Durable | Can be more expensive |
| Finish Nails with Coated Heads | 1.25" - 2.5" | Furniture Assembly, Cabinetry | Improved holding power | May require special tools |
| Plastic Collated Finish Nails | 1" - 2" | Nail Gun Applications, High-Speed Projects | Fast installation, Reduces labor time | Limited to compatible nail guns |
„Thanks to the LUVIR technology, the solder resist process could be switched directly from the previously used mask exposure to direct exposure. As an outstanding digital solution on the market, this technology has been able to demonstrate fast process times and superior quality on our certified conventional ink in production. This allowed us to fully digitize the solder mask process at low cost – without process or ink adjustments. An excellent benefit to our production in Rot am See.“
Ralf Göhringer (Head of Production WE Rot am See)
I would definitely recommend the Limata machine and team for a future company purchase
Michael Greenaway
Compunetics Inc.
“The Limata ldi has been amazing!! Best thing we did was buy this machine”
Richard Brady
GM
Circuitlabs
“Since 2019, we have been running the Limata X1000 LDI system (including LUVIR for solder mask imaging) in daily production as an addition to our current process with film. The machine was capable of properly exposing Taiyo PSR-4000 BN (DI) solder mask types on normal to high-copper boards using a new and unique direct imaging process. The machine operating interface is very user friendly which allowed for a quick technical training curve. The pre-registration processing reduced several seconds of production time at every print. Limata support and service staff is incomparable. They supported our team every step of the way at basically any time of the day or night, with literally, an immediate response time, customizing the software interface to best fit our Operations and needs.
We have exposed more than 8,000 prints since end of October, on various solder mask colors and some resist film panels. Limata, has proven to be very capable and innovative. They are a strong contender in the industry.
We have very much enjoyed this project, and working with the team!
Thank you Limata for the continued support and being a part of our growth.”
Bill Sezate
Vice President, GM
Summit Interconnect
As a replacement to our current contact exposure process with film, the LIMATA X2000 system including LUVIR-Technology was capable of properly exposing non-LDI solder mask types using a direct imaging process. The machine offers cutting edge software with a very intuitive operating interface which allowed for quick technician training curve. The dual drawer system combined with pre-registration processing reduced several seconds of production time at every machine cycle. Limata support and service staff is world class. They added software patches to keep production running at shortest possible response times, customized the software interface to best fit our in-house Operations system, and even wrote a step-by-step machine processing manual. As a result of the project, we have exposed more than 16,000 times on various product types and solder mask brands/colors. Limata, in a very short timeframe as a company, has definitely shown they are truly innovative and will be challenging the industry of direct imaging for the top spot.
Kevin Beattie
Process Engineer
TTM Technologies
Forest Grove Division