Choosing the right Heat Transfer Tank is not just a matter of selecting a vessel with enough capacity. The tank must suit the process, the fluid, and the way heat is supplied or removed. A mismatch can lead to uneven temperatures, slow batches, wasted energy, or difficult cleaning. Small details matter.
Start by defining the job. What material will the tank hold, and how much must it process per batch? Note its viscosity, operating temperature, and sensitivity to heat. A thin liquid may circulate easily, while a thick mixture can create cold spots near the tank wall. These differences affect whether a jacket, coil, or another heating arrangement is appropriate. They also influence the need for an agitator and the choice of construction material.
Look beyond the headline capacity. Check the usable volume, heat-transfer surface area, insulation, temperature controls, and access for inspection and cleaning. Ask suppliers for documented performance data under conditions close to your own process. A quoted heating time can be misleading if it assumes a different product, fill level, or starting temperature. Real operating conditions are rarely perfect.
Good questions come before a purchase. Confirm how the tank will connect to existing pumps, utilities, and controls, and consider how operators will monitor temperatures during a batch. Review maintenance needs and available technical support, too. The best specification is the one that fits both the process today and realistic plans for future production. There may be trade-offs. Even careful selection cannot remove every process uncertainty, so trial data and qualified engineering review can reveal assumptions worth revisiting.
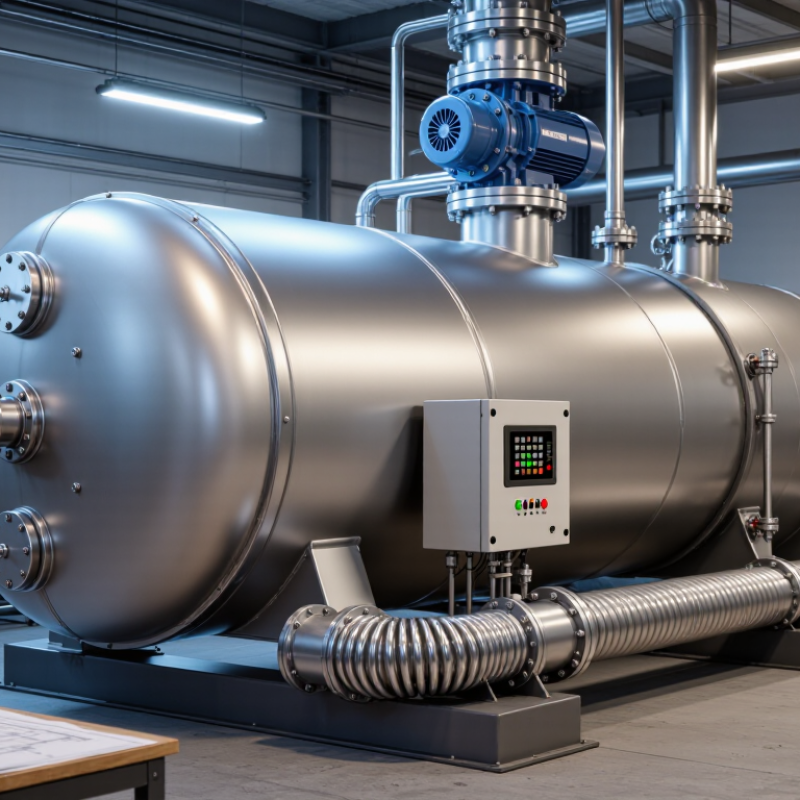
Choosing a heat transfer tank starts with the actual process, not the catalogue capacity. Record the batch size, fluid type, target temperature, and required heating or cooling time. Include the full operating range. A fluid that pours easily when warm may become thick during a cold start, changing circulation and heat transfer. Small details matter. Note whether the process needs gentle mixing, steady temperature, or repeated cycles, and whether ingredients settle or cling to the vessel walls.
Operating conditions shape the tank design. Check the normal and maximum temperatures, expected pressure, and how often the tank will be filled, drained, and cleaned. Match wetted materials to the fluid, and consider insulation if the tank must hold temperature between production steps. Controls should measure temperature where the product actually behaves, not merely near a heater connection. For example, a 200-liter batch may heat unevenly if the sensor sits in a warm zone while thicker product remains near the bottom. Test the assumption. I would treat any estimated heating time as provisional until it is checked with the real fluid and batch size; specifications often miss startup conditions or seasonal changes. Cleaning access and available floor space also deserve a place in the process review.
Calculate the usable heat load before choosing a heat transfer tank. For a batch, estimate energy with Q = mass × specific heat capacity × temperature rise. NIST’s Chemistry WebBook (Standard Reference Database 69) gives liquid water a heat capacity of about 4.18 kJ/kg·°C near room temperature. Heating 200 kg of water from 20°C to 80°C therefore requires about 50 MJ, or 13.9 kWh, before heat losses. A useful baseline. It is not the full heater rating.
Divide the required energy by the allowed warm-up time to estimate heater output, then account for losses through the tank, piping, and openings. Use the actual fluid’s heat capacity; thermal oils and glycol mixtures differ from water. Check the working temperature range too: include normal setpoint, startup conditions, and any short-term temperature peaks.
The U.S. Department of Energy’s Improving Process Heating System Performance: A Sourcebook for Industry emphasizes evaluating heating equipment alongside heat transfer and controls, rather than in isolation. That matters when circulation is uneven or the load changes during a shift. I would still question any blanket safety margin; measure the real duty cycle and heat loss where possible. A tank that reaches the setpoint slowly may need more heater power, not more stored capacity.
How to Choose the Right Heat Transfer Tank?
Tank material affects heat flow, corrosion resistance, cleaning, and service life. Stainless steel suits many demanding process environments, but the correct grade depends on the fluid and cleaning routine. Copper transfers heat quickly, yet it may not suit every fluid or maintenance plan. Check chemical compatibility and operating temperatures before comparing prices. A material that looks ideal on paper can disappoint in daily use.
Design changes how evenly heat reaches the contents. A jacketed tank warms the vessel wall, while an internal coil adds heat through a smaller surface. Consider the fluid’s thickness, mixing needs, and available space. Heating methods matter, too. Electric elements offer direct control; steam or hot-water circuits may fit existing plant systems. Each option needs suitable controls, insulation, and safety checks. There is no universal winner.
Tips: Ask for temperature ranges, heating-surface details, and cleaning requirements. Picture a cold morning startup, not just steady operation. Verify that sensors measure the product, not only the tank wall. Small details are easy to miss. I would also leave room for future changes; that choice can feel excessive until the process shifts.
Compare tank materials, designs, and heating methods
Typical thermal conductivity at about 20°C (W/m·K)
Copper and aluminum conduct heat well, while stainless and carbon steel are common tank materials with lower conductivity. Conductivity alone does not determine heating performance: wall thickness, heat-transfer area, insulation, and the product being heated also matter. Choose a jacket or internal coil to suit the process; steam, hot water, and electric heating each have different operating and control requirements.
Choosing a heat transfer tank means checking how well its controls match the real process. Look for a readable temperature display, adjustable setpoints, and a separate high-limit cutoff. A sensor placed near the outlet can reveal temperature swings that a tank-wall reading may miss. Small details matter. The U.S. Department of Energy’s Advanced Manufacturing Office estimates that process heating accounts for about 36% of manufacturing energy use. That figure makes stable control and heat retention worth examining, not just the tank’s purchase price.
Insulation should cover the tank body, access panels, and nearby hot piping. Ask for insulation thickness and rated operating temperature, then check for gaps around nozzles and supports. Those small bare spots can become hot to the touch and waste energy. DOE’s Improving Process Heating System Performance sourcebook recommends assessing the heating system as a whole, rather than treating equipment in isolation. In practice, a tank can be well insulated while connected pipes still lose heat.
Safety features deserve a hands-on review. Confirm that the system has an independent over-temperature shutdown, suitable pressure relief, low-fluid protection, and clearly marked emergency controls. Guards around hot surfaces help protect operators during routine checks. Match each device to the fluid, operating pressure, and maximum temperature; a generic safety list is not enough. I would also verify alarm response during commissioning. It is easy to assume an alarm works until nobody tests what happens next.
Check Installation Needs, Maintenance, and Lifecycle Costs
A tank can fit on a drawing and still be difficult to install. Measure doorways, ceiling clearance, floor loading, and space for pipework before selecting capacity. Check where technicians will stand to inspect valves, clean the vessel, or remove internal components. A few inches matter. Also confirm the tank suits the actual fluid, operating temperature, and heating or cooling load—not just the system’s average conditions.
Maintenance access affects more than convenience. Look for drain points, inspection openings, replaceable seals, and surfaces that can be cleaned without dismantling nearby equipment. One detail is easy to miss: poor insulation can quietly add to operating costs over years of service. The U.S. Department of Energy’s 2022 Industrial Decarbonization Roadmap reports that industry uses about one-third of U.S. energy. That is a useful reminder to assess heat loss as part of equipment selection. Compare options using expected energy use, installation, routine service, likely repairs, downtime, and eventual disposal. NIST Handbook 135’s life-cycle cost method likewise considers costs across an asset’s service life, not purchase price alone. I would still treat projected maintenance intervals cautiously; real fouling and wear depend on the process. Add a realistic allowance for both.
„Thanks to the LUVIR technology, the solder resist process could be switched directly from the previously used mask exposure to direct exposure. As an outstanding digital solution on the market, this technology has been able to demonstrate fast process times and superior quality on our certified conventional ink in production. This allowed us to fully digitize the solder mask process at low cost – without process or ink adjustments. An excellent benefit to our production in Rot am See.“
Ralf Göhringer (Head of Production WE Rot am See)
I would definitely recommend the Limata machine and team for a future company purchase
Michael Greenaway
Compunetics Inc.
“The Limata ldi has been amazing!! Best thing we did was buy this machine”
Richard Brady
GM
Circuitlabs
“Since 2019, we have been running the Limata X1000 LDI system (including LUVIR for solder mask imaging) in daily production as an addition to our current process with film. The machine was capable of properly exposing Taiyo PSR-4000 BN (DI) solder mask types on normal to high-copper boards using a new and unique direct imaging process. The machine operating interface is very user friendly which allowed for a quick technical training curve. The pre-registration processing reduced several seconds of production time at every print. Limata support and service staff is incomparable. They supported our team every step of the way at basically any time of the day or night, with literally, an immediate response time, customizing the software interface to best fit our Operations and needs.
We have exposed more than 8,000 prints since end of October, on various solder mask colors and some resist film panels. Limata, has proven to be very capable and innovative. They are a strong contender in the industry.
We have very much enjoyed this project, and working with the team!
Thank you Limata for the continued support and being a part of our growth.”
Bill Sezate
Vice President, GM
Summit Interconnect
As a replacement to our current contact exposure process with film, the LIMATA X2000 system including LUVIR-Technology was capable of properly exposing non-LDI solder mask types using a direct imaging process. The machine offers cutting edge software with a very intuitive operating interface which allowed for quick technician training curve. The dual drawer system combined with pre-registration processing reduced several seconds of production time at every machine cycle. Limata support and service staff is world class. They added software patches to keep production running at shortest possible response times, customized the software interface to best fit our in-house Operations system, and even wrote a step-by-step machine processing manual. As a result of the project, we have exposed more than 16,000 times on various product types and solder mask brands/colors. Limata, in a very short timeframe as a company, has definitely shown they are truly innovative and will be challenging the industry of direct imaging for the top spot.
Kevin Beattie
Process Engineer
TTM Technologies
Forest Grove Division